I love this blanket! It's fuzzy on one side and quilted on the other side. Hmmmm... I wonder what we can do with this 'trashed' blanket to make it a treasure. Think, think, think!
Binding a raw edge is super fun and easy. Here's how:
Iron out the wrinkles. It's important! Trust me!
Measure the raw edge of the blanket and add a couple inches. If your fabric is not long enough, you can sew strips together. It's always better to make your strip a lot longer than the edge you want to bind.
Cut the excess fabric about 1/4 inch or less from the stitching.
Fold the strip of fabric, lengthwise, wrong sides together and press.
Now you are ready to attach the binding to the blanket.
Place the raw edges together, starting with the end that you just ironed that little 1/4 inch hem. I like to use the edge of my presser foot as the guide for my seam allowance. Your seam allowance need not be wide (less bulk). Sew as straight as possible! You can pin in place if you need help holding it all together.
When you get close to the end, fold in another 1/4 inch hem (but don't worry about ironing it) making sure that the edges are even. Finish sewing to the end and back stitch to lock your stitches in place. Now the binding is attached to the blanket. Yay!
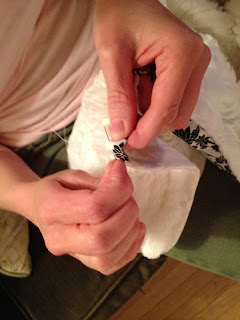
Press the binding toward the raw edge. The next part is my favorite! Hand sewing!
Fold the binding over to cover the raw edge. Use the line you stitched as your guide. You may pin in place, but I find that they get in the way. Use the hidden stitch to attach. If you don't know how to do the hidden stitch, google it. There are a ton of tutorials out there.
This almost landed in the trash, but now it's a treasure! I am happy with how you don't see much of the floral, making it modern and funky.
Next Up:
What should we do with this leftover fabric? Throw it away! Have you learned nothing, Grasshopper?


No comments:
Post a Comment